The #1 LinkedIn Marketing Guide (2019)

We’re Hiring A Videographer/Editor
May 16, 2019
5 Most Entertaining Marketers On LinkedIn
July 12, 2019
🤔 Are you looking to generate a consistent stream of opportunities on LinkedIn?
👌 Higher paying customers? New business relationships? A better job? Speaking opportunities?
👇 In this detailed LinkedIn Marketing Guide, I’ll walk you through actionable steps you can take to generate these opportunities by optimising your profile, creating high-performing content consistently and having a structured approach to driving engagement.
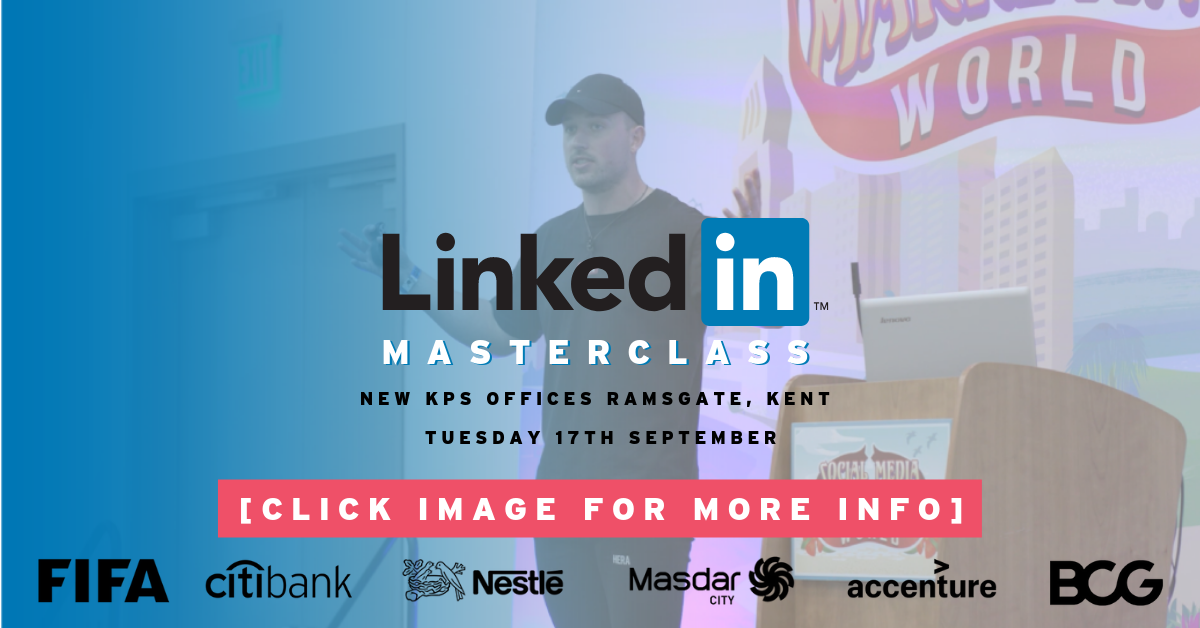
We’re also excited to announce we’re running a 1-day LinkedIn Masterclass in Kent on Tuesday 17th September 2019 (click button below to see details).
LinkedIn Marketing Guide Sections
This guide is broken up into the following segments. Each segment will explain what it is and why it’s important, followed by examples of best practice, then step by step Actions to implement the advice.
LinkedIn Profile Optimisation
- LinkedIn Profile Photo
- LinkedIn Header Image
- LinkedIn Headline
- LinkedIn Bio
- LinkedIn Profile Media
- LinkedIn Profile Experience
- LinkedIn Profile Contact & Personal Info
- LinkedIn Profile Skills & Endorsements
- LinkedIn Profile Recommendations
- LinkedIn Profile Public Settings
- LinkedIn Profile URL
- LinkedIn Profile Interests
LinkedIn Activity
- LinkedIn Posts
- LinkedIn Connections
- LinkedIn Engagement
Additional LinkedIn Marketing Resources
- Videos
- Articles
- Podcasts
- LinkedIn Users To Follow
LinkedIn Profile Optimisation
LinkedIn Profile Photo
Your profile photo is one of the first things people who view your LinkedIn profile in LinkedIn search or directly on your profile will view. It needs to communicate a great first impression.
You need to upload a new professional headshot photo that’s high quality and well-lit. The video below shows you how to take a professional headshot with your smartphone.
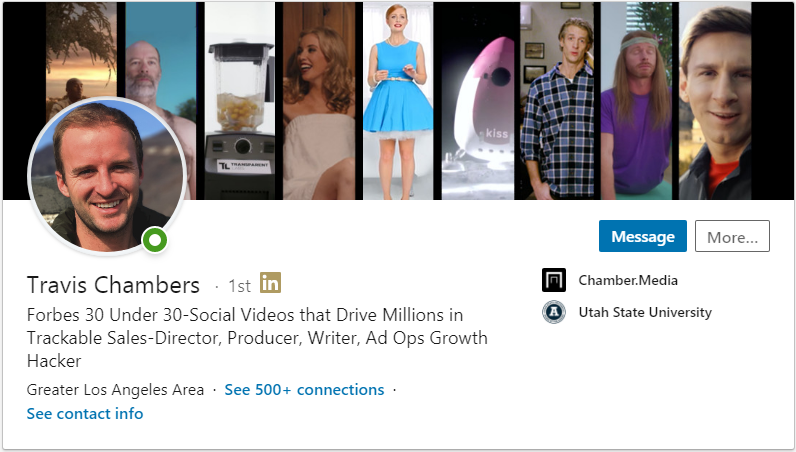
Examples of Great LinkedIn Profile Photos
Click the profile photo to go to the person’s LinkedIn profile.


Action: Upload your new headshot
You’ll need a square photo with pixel size ranging from 400 x 400 pixels and 20,000 x 20,000 pixels with a maximum file size of 8 MB.
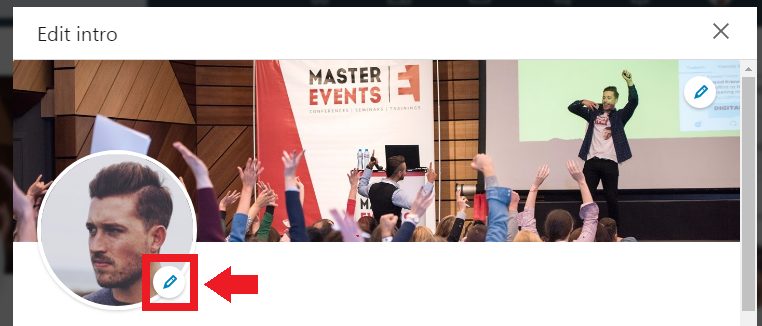
1. Click the pencil icon at the top right of your profile.

2. Click the pencil icon in the bottom right of your current profile picture.
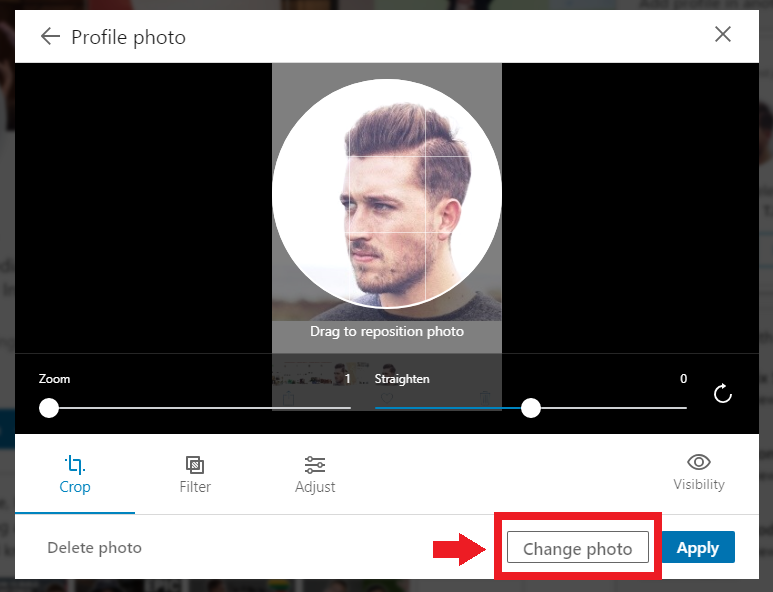
3. Click change photo, locate and choose the image, use the settings to make sure it fits nicely in the circle and click Apply.
LinkedIn Header Image
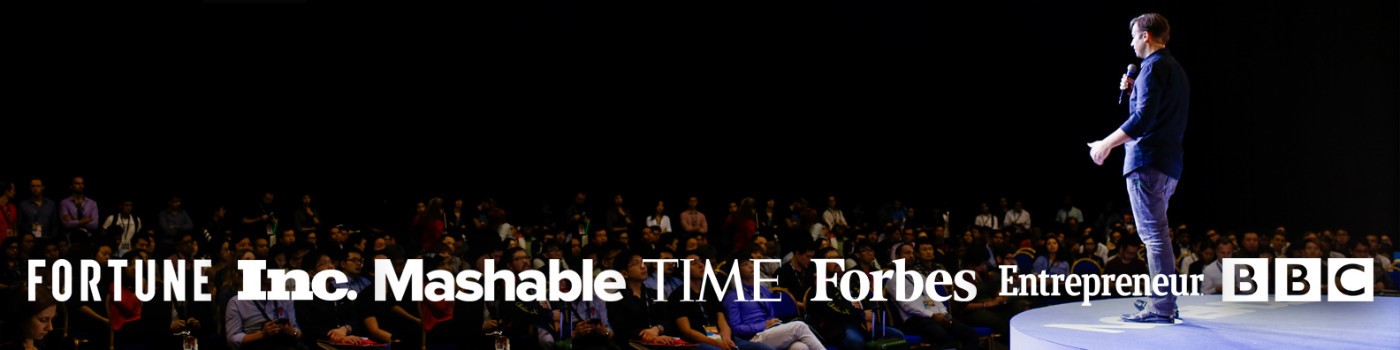
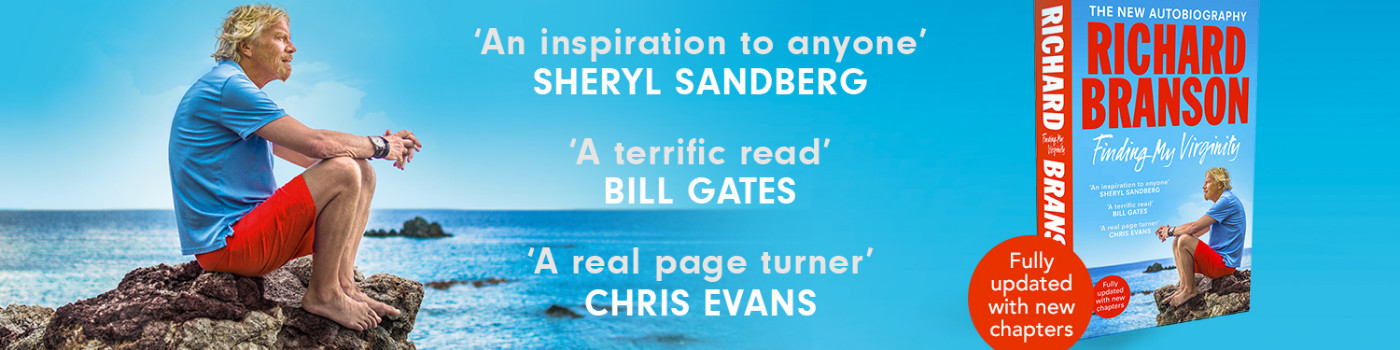
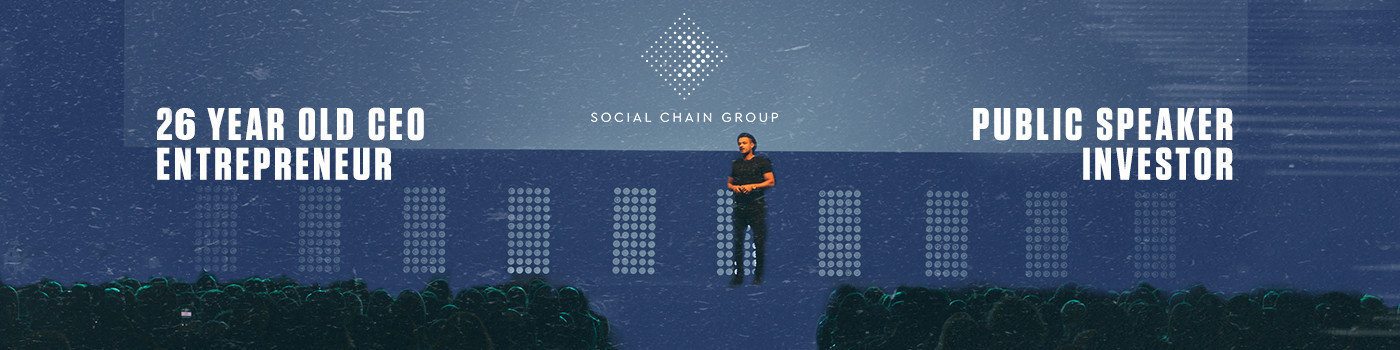
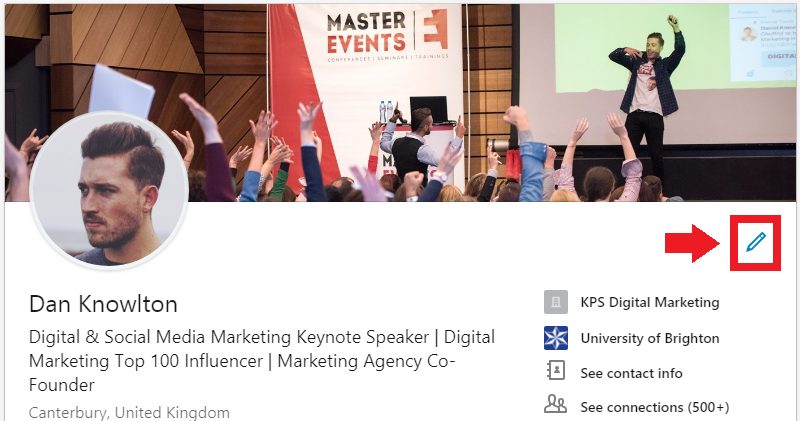
The header image is the rectangle image at the top of your profile. This image is one of the first things people see when viewing your profile. This is a great place to build trust and social proof.
This could be a photo showing you working with a client, a team photo or a professionally designed image showing some logos of customers you’ve worked with.
No matter what, your header image needs to look professional and be focused around communicating a good first impression to people visiting your profile.
BONUS TIP: What do the people you want to appeal to need to see to trust that you can deliver what you say you can deliver? Communicate that in your header image.
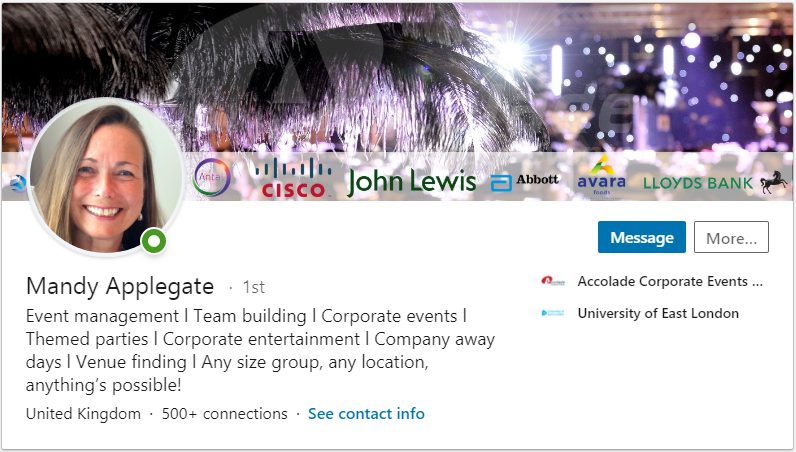
Examples of Great LinkedIn Header Images
Click the header image to go to the person’s LinkedIn profile.

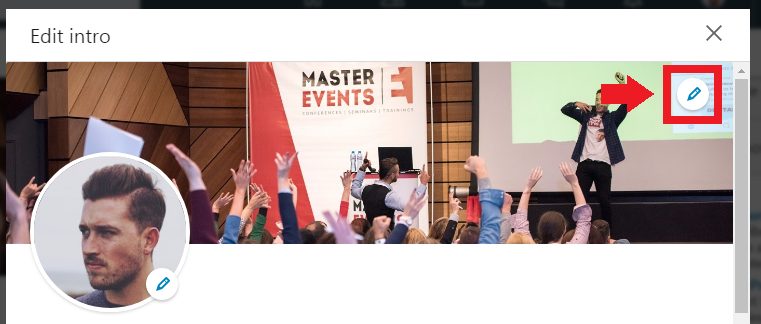
Action: Upload your new LinkedIn header image
You can either get your header image designed or use a free tool like Canva. The image needs to ideally be 1,584 pixels x 396 pixels.
Once you have decided which image you will use, click the pencil icon at the top right of your profile, then click the pencil at the top right or your header image, choose your new header image and click save.
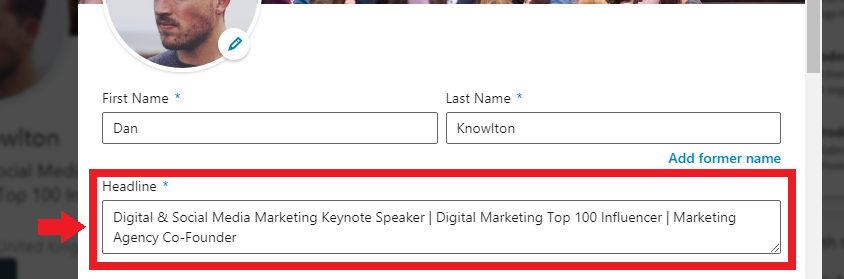
LinkedIn Headline
When you send a connection request on LinkedIn, your headline is one of only four pieces of information the person you want to connect with will see first (the others are name, profile picture and mutual connections).
The keywords in this headline also highly impact how you are found by other LinkedIn users who are searching for people like you
For example, if you are looking for new customers, you need to do keyword research to identify which keywords potential customers would type in LinkedIn to find people like you who can solve their problems.
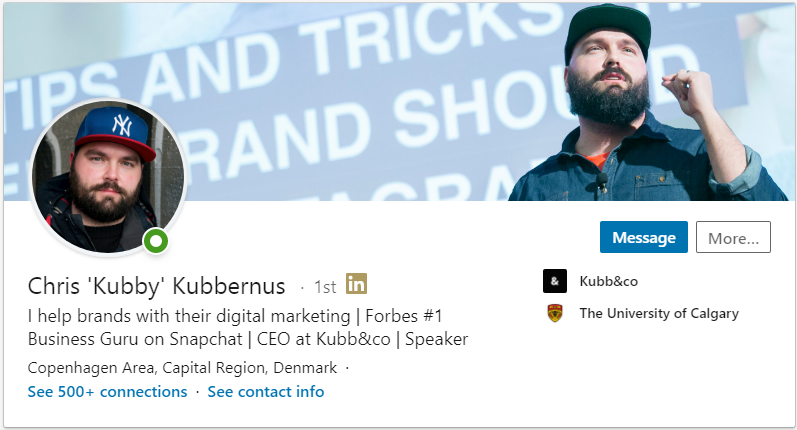
Examples of Great LinkedIn Headlines
Click the image to go to the person’s LinkedIn profile.
Action: Develop a new LinkedIn headline based on keywords your target market search for
This super duper detailed Keyword Research Guide will show you how to identify the right keywords. For a less advanced, quicker (but less effective) way to identify keywords, take the following steps.
1. Use a keyword planner tool like Google Keyword Planner or Keyword Tool to identify the keywords your target market search for when looking for someone like you. Also use your initiative to come up with these keywords. Write down a list of 10 – 20 ideas.
2. One by one, individually type these keywords in the search bar to see what comes up. Is it people doing similar things to you?
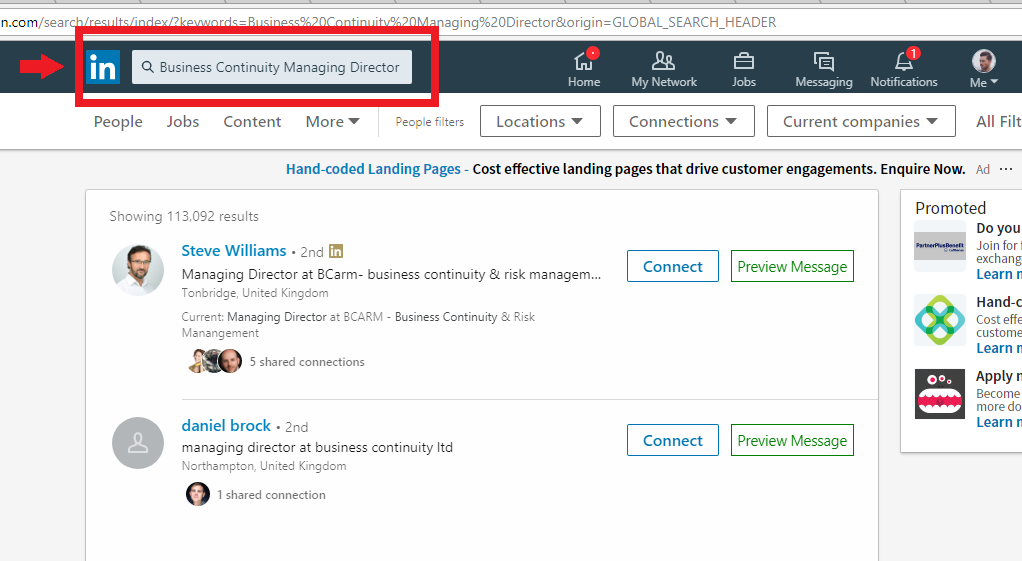
3. Try and identify patterns of the headline keywords (first line of writing under the person’s name) being used by the people who are showing up at the top of the search results. Repeat this search and pattern identifying process 10-20 times for the 10 – 20 keyword ideas you came up with in step 1.
4. Choose 3 – 5 of the keyword titles that you recognised as showing at the top of search results that are relative to you and what you do.
5. Click the pencil icon in the top right of your profile.
6. Write the 3 – 5 keywords in the Headline box, you can use this icon >> | << to split up the keywords. See the example below to see how this should look. Click save.
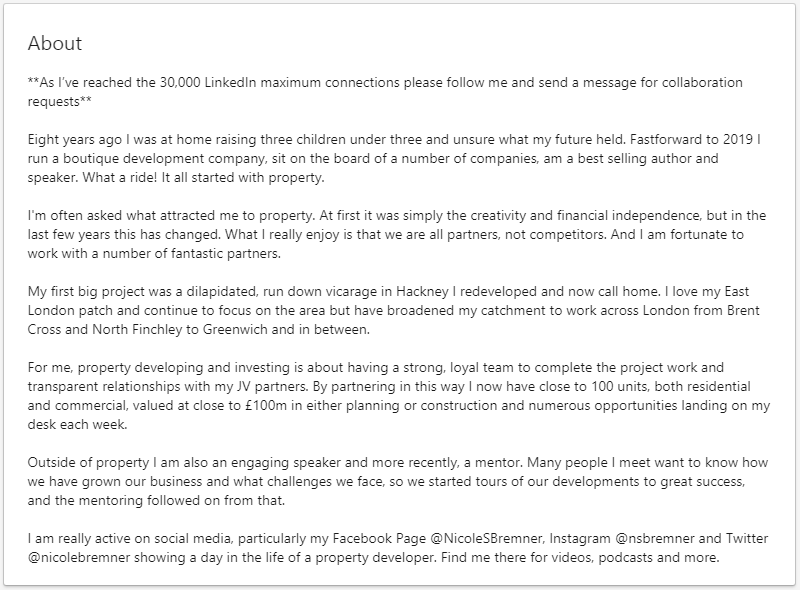
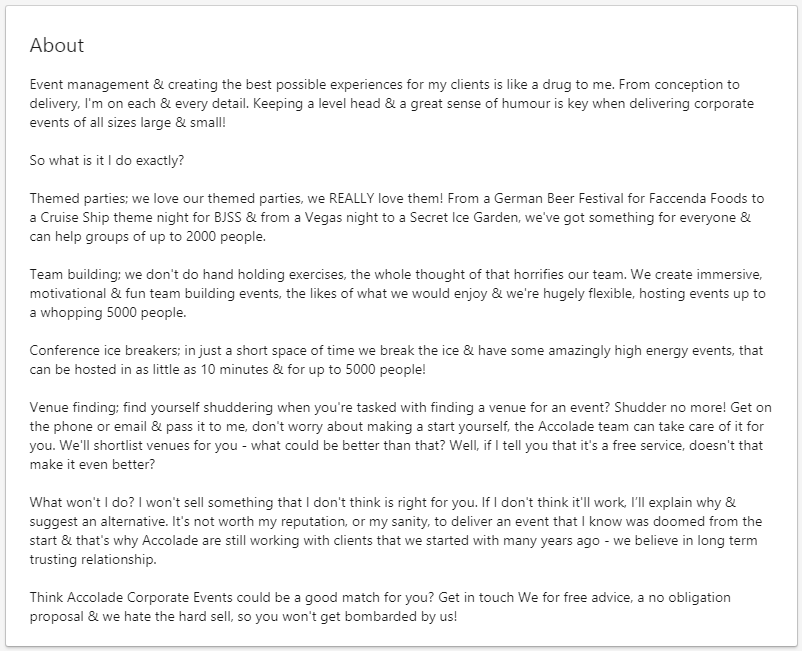
LinkedIn Bio
Your bio is the main block of text under your photo, header image, title, and other basic information. Viewers only see the first three lines of your bio unless they click “See more” so hooking your audience’s interest with that first segment is important.
The keywords you use impact how you are found in search, so try to use as many of the keywords you identified in the previous LinkedIn Headline section as possible, ensuring the text flows as if you were speaking.
Write in first person, tell your story, make your bio relevant to the potential customers/decision makers you are trying to reach. What would they be looking for to qualify that you’re the type of person/ company they would want to work with?
Examples of Great LinkedIn Bios
Click the image to go to the person’s LinkedIn profile.
Action: Write your LinkedIn bio taking the tips provided on board
Try and include as many of the keywords you identified in the previous LinkedIn Headline section as possible, ensuring the text flows as if you were speaking. The closer the keywords are to the top of the bio section, the better.
Try and write the first 2 or 3 lines with the main aim of enticing people visiting your profile to read more. What can you say that will intrigue them and leave them no choice but to click ‘see more’ and read more about you?

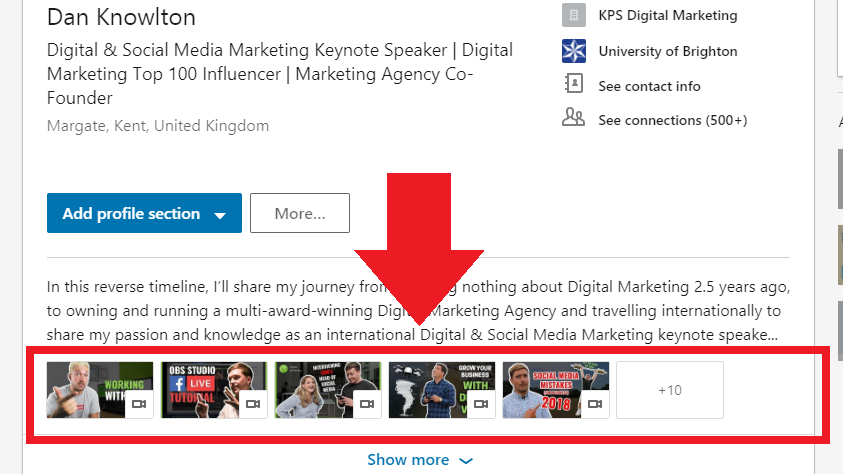
LinkedIn Profile Media
Just below your bio is the ‘media’ section. This is a great opportunity to attach different forms of media that provide some kind of value to the person viewing your profile. This could be something that is educational, informative, inspiring, entertaining or simply improves your credibility and helps them make a decision as to whether you’re the kind of person/ company they’d like to work with.
Uploading a case study as a video or PDF could be a great way to use this feature.
For example, we attach our educational, informative and entertaining YouTube videos as you can see from the screenshot below.
The following file formats are supported:
- Adobe PDF (.pdf)
- Microsoft PowerPoint (.ppt/.pps/.pptx/.ppsx/.pot/.potx)
- Microsoft Word (.doc/.docx/.rtf)
- OpenOffice Presentation Document (.odp)
- OpenOffice Documents (.odt)
- Most .txt files
- .jpg/.jpeg
- .png
- .bmp
- .gif – this doesn’t support animation, however the first frame will be extracted
- .tiff
Important
- The file size may not exceed 300 MB.
- The maximum resolution for images in 120 mega pixels.
Examples of Great LinkedIn Profile Media Usage
Click the image to go to the person’s LinkedIn profile.


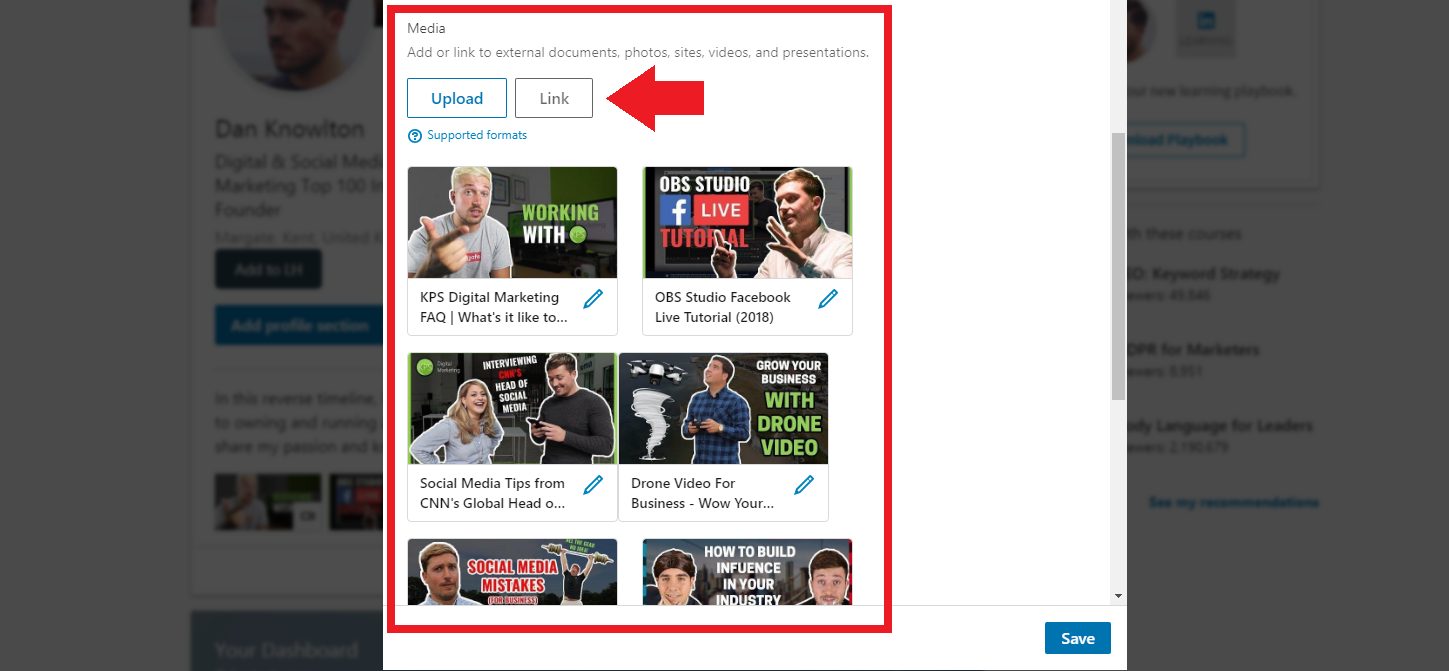
Action: Upload relevant media to your LinkedIn profile
1. Brainstorm ideas for media content that could be uploaded to this section of your LinkedIn profile. Is there any media already produced that you could use? If not, what media will you create and who will create it?
2. Once you’ve identified/produced the media, click the pencil icon at the top right of your profile, scroll down to Media and either upload or add a link to the media then click Save.
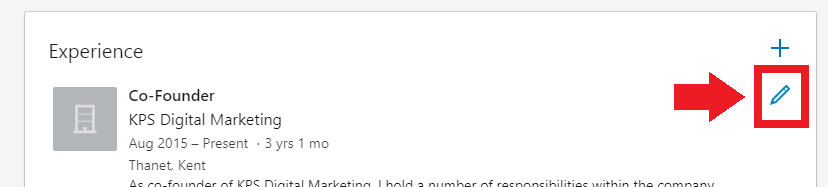
LinkedIn Profile Experience
The next section on your profile is ‘experience’. Like all other sections, when filling this out, you need to think what a potential customer/decision maker would be looking for.
What responsibilities did you have in each job role? What value did you add to the company? Did you win any awards? What did you learn? What skills did you acquire?
Action: Update experience section
Use the information provided above to fully fill out the description section under each job role. You can do this by pressing the pencil icon at the top right of the experience section as shown below.
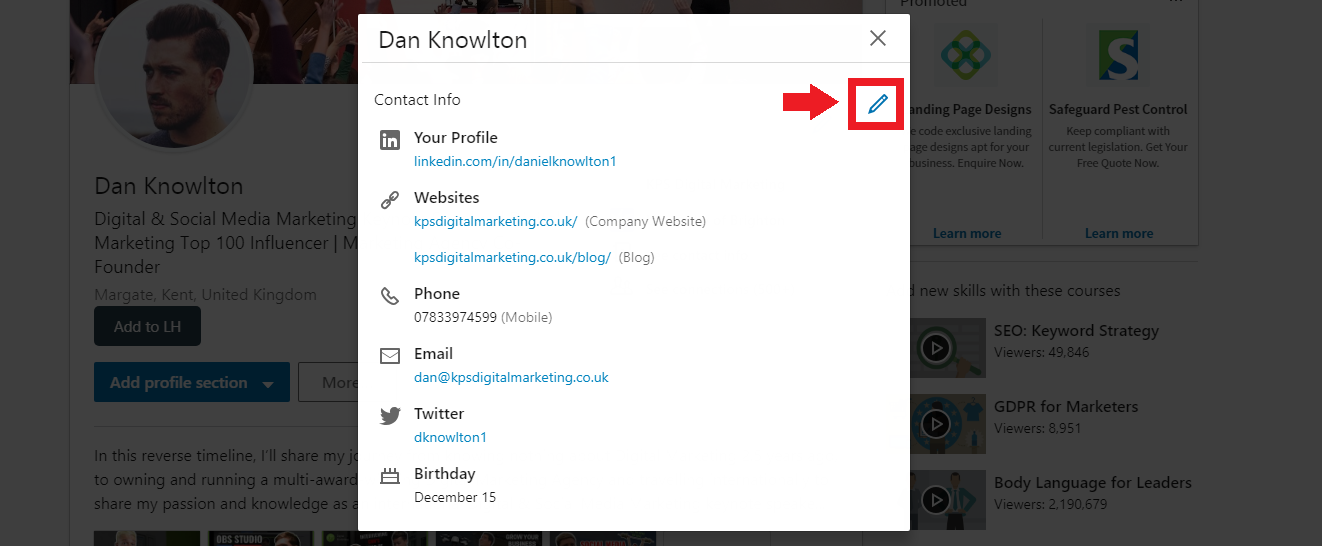
LinkedIn Profile Contact & Personal Info
Ensuring you have updated contact information is a simple action to ensure everyone who wants to make contact can.
Action: Update LinkedIn profile contact information
1. Click See contact info at the top right of your profile.
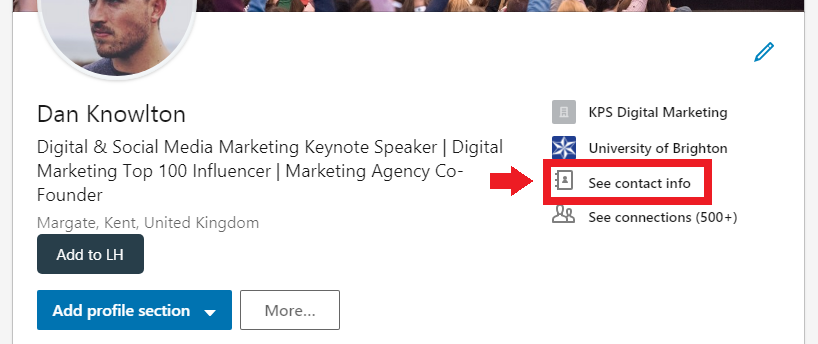
2. Click the pencil icon, fully fill out the correct contact information and then click Save.
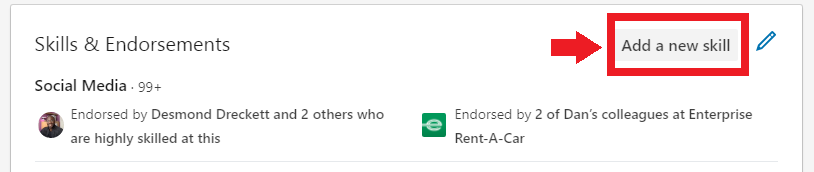
LinkedIn Profile Skills & Endorsements
Receiving genuine endorsements on your chosen skills, from people that know you or have worked with you, will increase your credibility to potential customers who are viewing your profile.
In my opinion this section holds much less clout than it used to, but it’s still beneficial to have on your profile.
Action: Update LinkedIn profile skills and give endorsements
Firstly, try and add 5 – 10 additional skills that you have by clicking add new skill at the top right of the skills and endorsements section, searching for relevant skills and clicking add.
Next, the best way to increase your own endorsements, is to endorse others who you know or have worked with. Remember, these need to be genuine endorsements.
Try to endorse 1-5 people per week, this will take a total of around 2 – 5 minutes per week.
To do this go to someone’s profile that you would like to endorse (you must be connected), scroll down to the skills & endorsements section and click the plus icon next to one or more of their skills.

LinkedIn Profile Recommendations
Recommendations are like references or testimonials. Ask for them from your current employer, past employers you have a positive relationship with, clients, customers, and partners. Get at least five recommendations, but the more the better.
Action: Gain at least 5 recommendations
The best way to get a recommendation is to either use the ask for a recommendation feature or simply give others recommendations. From my experience, they’re likely to return the favour.
1. To ask for a recommendation, firstly scroll down to the recommendation section on your profile and click ask for a recommendation.
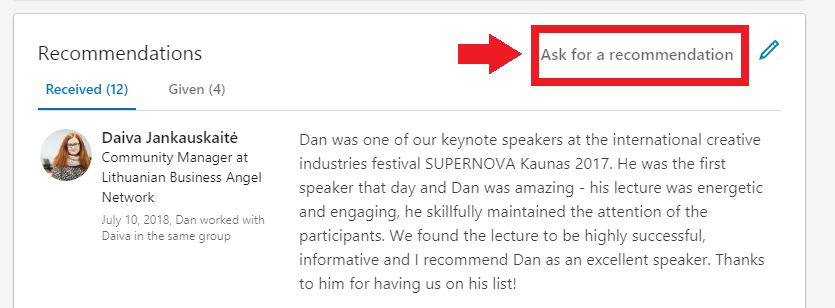
2. Type in the persons name you would like to ask for a recommendation, click their profile and then follow the simple steps shown on screen.
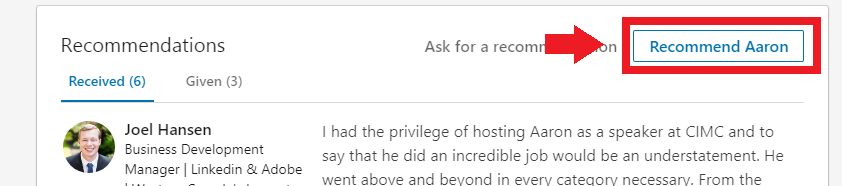
To give a recommendation, simply go to a person’s profile, scroll down to the recommendations section click Recommend [Name] and follow the simple steps on screen.
LinkedIn Profile Public Settings
Sometimes your privacy settings have been set so that when you visit someone’s profile your visit shows up as “Anonymous” or that not everyone can find your profile. Switch it to public so that people can discover you easily and then connect with or follow you.
Action: Ensure your LinkedIn profile is set as public
1. Click your profile image at the top of the page and then click settings & privacy.

2. Click privacy and then edit your public profile.
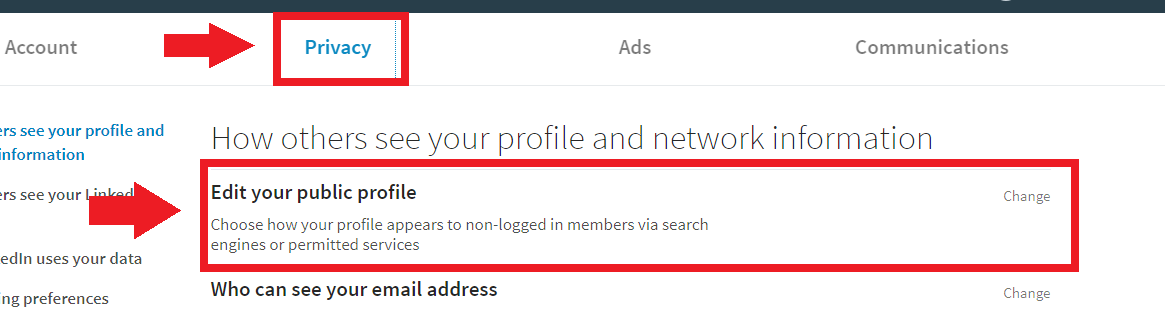
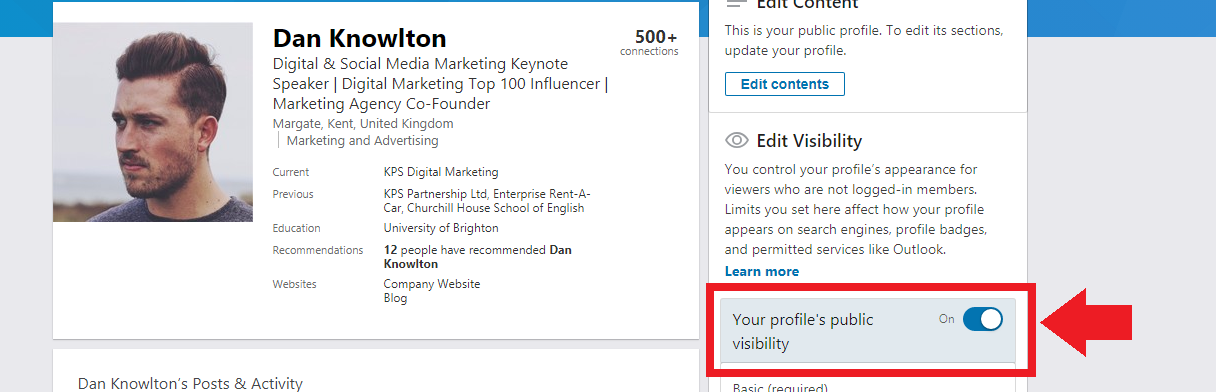
3. Ensure your public profile’s visibility is switched on.
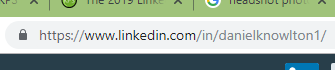
LinkedIn Profile URL
Choose a customised URL, rather than a default one. It looks more professional.
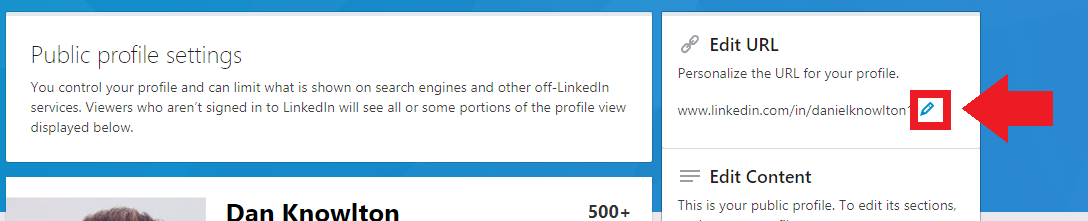
Action: Customise your LinkedIn profile URL
1. Follow steps 1 and 2 from the previous public settings section.
2. Click the pencil icon and edit your URL. I suggest seeing if the following URLs are available;
/yourname
/your-name
/yourname1
LinkedIn Profile Interests
Under this section, you’ll find information related to influencers and companies you follow, groups you’re a member of and education.
If you haven’t done so already, add your educational experience and join a few groups you’re interested in. This makes your profile more complete, alive, and credible, but it does something else even more important.
When you send someone a connection request, especially someone well-connected, they often scan your profile to quickly see if your profile is real or fake. If they see that you both went to the same school, this is often all it takes to put their mind at ease. Common group memberships provide similar reassurance.
Action: Update education and join more groups
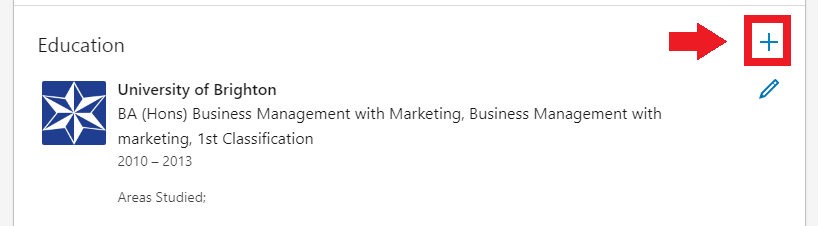
1. Scroll down to the education section, click the plus icon, add any relevant education information (with as much detail as possible) and click save.
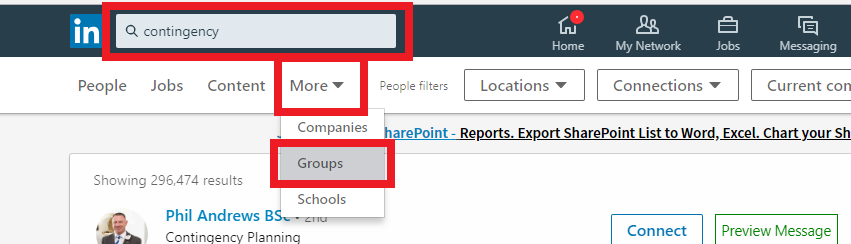
2. Now it’s time to find some more relevant groups to join. In the search bar at the top of the page type in a keyword to do with your industry e.g. “contingency”, click the more box and click groups.
3. Click on any groups that seem appealing and click ask to join. You should aim to be a part of at least 10 groups.

LinkedIn Activity
Having an optimised profile is incredibly important to give you the best chance of being found in search and making the best impression to anyone who visits your profile (especially potential customers).
To really gain traction on LinkedIn however, you need to be active. This means posting content, engaging with other people’s content and connecting with relevant people to build your network.
There’s a lot to talk about here which we cover in our LinkedIn Masterclass. I’ve summarised some of the key points below.
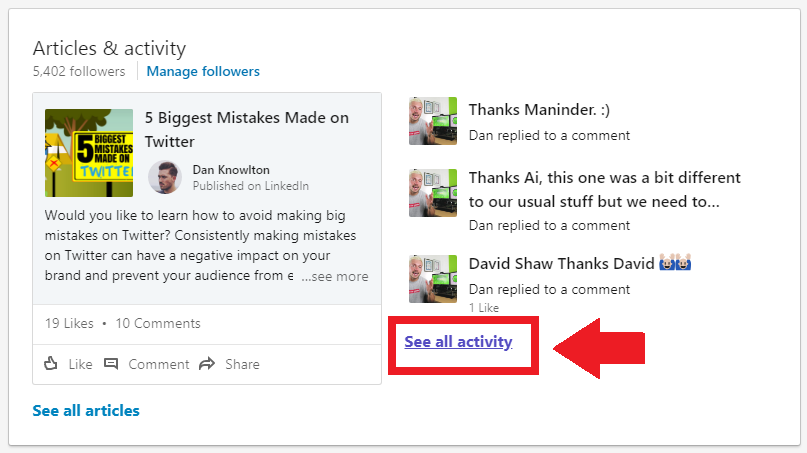
To audit and have a look at your own current activity, go to your profile, scroll down to Articles & activity and click see all activity.
LinkedIn Posts
In terms of what to post, you need to start with your potential customer/key decision maker and then develop an effective content strategy focused around attracting, convincing and converting them to take whatever action it is you want them to eventually take.
In the Content Marketing Funnel article I wrote, I share how you can develop an effective content strategy, it’s worth a read. Below is also a live interview I did with Natalie Hailey talking through this concept.
I talk to THE Dan Knowlton about…⭐️How to develop creative content that converts consumers into customers⭐️How your content should fulfil the needs of your audience dependent on where they are on the sales funnel. Dan’s also going to share different examples of how he’s been creative with content and how other publishers are too.It’s gonna be a good one! 💪
Posted by Natalie at Hot Content on Tuesday, 28 August 2018
A great post topic will prompt other LinkedIn users to comment, like and share your LinkedIn post. In turn, this will create a snowball effect, reaching a wider audience, prompting further engagement.
This will help you get in front of more of your target audience.
In the “LinkedIn Marketing 2019: How To Craft A Viral Post” article I recently wrote, I provide a detailed breakdown of how to structure a post to give it the best chance of going “viral”. I explain elements of this in the video below.
Examples of Great LinkedIn Posts
Action: Publish LinkedIn Content Consistently
There is no perfect formula for volume of posting on LinkedIn. If you have the resources to publish 5 great quality posts per day then great.
Most people don’t have this amount of time. I’d aim for 3-7 posts per week initially and then scale up or down appropriately as you start to see the return you are getting from the time you are investing.
Below are some prompts for how to develop some interesting LinkedIn content ideas.
- What problems do your target market have (relative to your expertise) that you could provide a solution for in a post?
- What questions do your target market ask you or your team most often that you could answer in a post?
- What questions should people ask you but don’t? Answer these in a post.
- Throughout your career, what have you learnt that your target market will find interesting/ gain value from?
- What kind of tools do you use that your target market may be interested in? How do they work and what tips do you have for new users?
- What is the one statistic that emphasises the importance of your product/service best? Why is this stat important?
- Throughout your career what interesting stories do you have, that your audience may be interested in? What did you learn from that experience?
- Is there a risky (illegal or unethical) way to solve the problems that your company solves without the risk? What could go wrong? What’s the worst that could happen?
- What relevant lessons could your audience learn from a famous person, movie, TV show, book, or song?
- Explain how and why you have changed your approach (or stopped doing something) since you started out in your industry. How can this benefit your target market?
- What questions is no one in your industry willing to answer? Answer it in a post.
- What do you believe will happen in the future that other people consider impossible or unlikely (relevant to your industry)?
LinkedIn Connections
Connecting with other LinkedIn users is one of the best ways to build your network and build relationships with other people that can help you achieve your objective(s).
Now, it’s important that you start a habit of connecting with everyone you meet in person, especially potential customers. Connecting on LinkedIn provides a virtual business card that you will never lose.
Make sure you send a personal note when connecting to remind the person how you know them and why you are connecting.
Action: Connect with 5 new connections per week
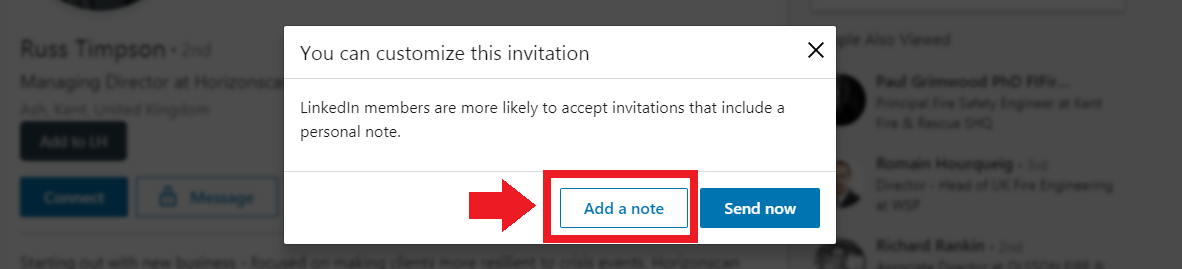
1. Search the person’s name in the LinkedIn search bar, click their profile and click the connect button which is underneath their profile photo. Make sure you click add note when this pops up and add a small note reminding the person how you know them and why you’d like to connect.
LinkedIn Engagement
Engagement on LinkedIn helps you gain exposure, build relationships and demonstrate your knowledge and expertise. The main type of engagement you should focus on is adding meaningful comments to other people’s content.
By “meaningful” I mean not just a simple, “well done” or, “this is great”, think how you can add to the conversation. Do you have an interesting or opposing view? What experiences have you had related to the post that you could share?
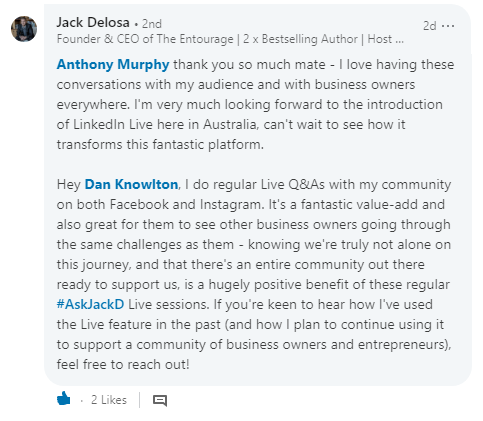
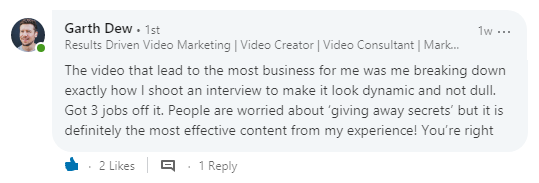
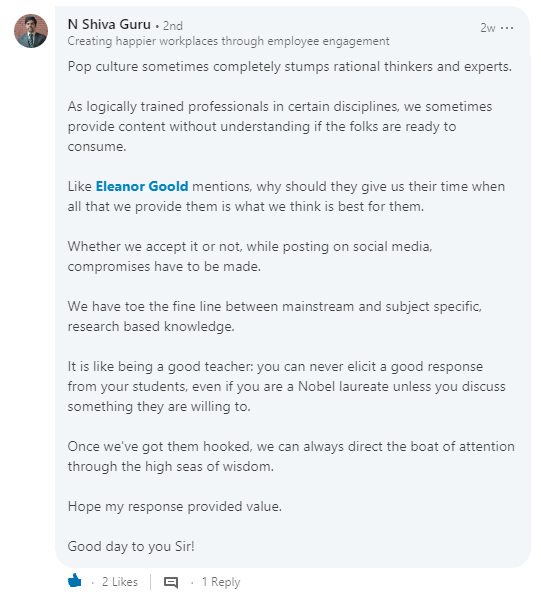
Examples of Great LinkedIn Engagement
Click the image to go to the person’s LinkedIn profile.
Action: Comment on 5+ posts per week
1. Add a reminder in your calendar once a day to add a meaningful comment to one of your LinkedIn connection’s posts.
Open up LinkedIn and scroll through your news feed, find a relevant post you’d like to comment on and leave your meaningful comment.
Additional LinkedIn Marketing Resources
Videos
Articles
LinkedIn Marketing: The Ultimate LinkedIn For Business Guide
How To Use LinkedIn Effectively
How To Make The Most Of LinkedIn
Podcasts
LinkedIn Users To Follow
💁♂️ Josh Steimle
💁♂️ Travis Chambers
💁♂️ Mark Gaisford
💁♂️ James Sinclair
💁♂️ AJ Wilcox
What Next?
It may feel a bit daunting reading all of this information and thinking about how much you have to do to generate a steady stream of opportunities on LinkedIn, I felt exactly the same when I started!
To help people like you out, we’re running an in-person 1-day LinkedIn Masterclass at our brand new offices in Kent.
The Masterclass will give you an opportunity to gain tailored advice and support and learn specific implementation tactics that will make implementation much more manageable.

